My Final Movie
My 30 Second Movie from Matt Evans on Vimeo.
My Thoughts
Personally I am not very pleased with the outcome. While having so many frustrating issues towards the end I found myself rushing to get parts completed. While I am not fond of my animation I am really proud of all my final models. I took an enormous amount of time refining and making them look great. I believe having them become corrupt really brought my willingness to perfect the animation lower.
From this I have learnt that I should not wait to be told when to start each section of a project. Although helpful with giving out tasks, everyone works at their own pace and has their own work completion threshold. Waiting until the final 4 weeks was not enough time to create what I truly wanted. Also my planning was not up to scratch as I had planned to have many more scenes than actually shown. If I had spent more time planning I could have known how long to have each scene in and what was possible with out 30 second time-limit.
Showing posts with label About. Show all posts
Showing posts with label About. Show all posts
Thursday, 15 December 2016
Wednesday, 14 December 2016
Houston We Have Another Problem
While trying to complete my animation in Maya 2016, I have never had so many issues with files and programs crashing and models messing up.
Issue #1:
Installing Maya at home.
As a student you can get Maya really easily as an installer, Just get to correct tab, select the correct OS, the version you desire and the language. At this point you can install properly using an installer. But every time I attempted to install using the installer it would always fail installing three different sections. I had even attempted getting the installer again after getting rid of the first version and trying on a different PC all together. But to no victory.
 Issue #2:
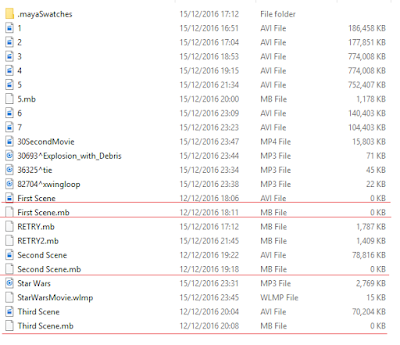
Corrupted Scenes.
After creating three or four different .avi scenes ready for hand-in. I thought I would have a break and come back to it. Once I returned Maya could not recognise the file type and loaded nothing on to the scene.
Issue #3:
Corrupted Models.
Models saved as a .FBX (exported maya model) was not the correct file type and were wiped.
Models could not be exported as a .FBX later into the course.
Models saved as .MB (maya binaries) were not supported and were wiped. Meaning I had to re-texture my X-Wing model.
While trying to import my Imperial Star Destroyer and my TIE Fighter it would just change the scale of my Star Destroyed without a visible TIE-Fighter model.

Issue #4:
Corrupt .avi
We had to create our animation using .avi file format. So once I had completed one of my scenes and already previously viewed the file I had carried on creating more scenes. Later on my .avi file had been corrupted and wiped so the scene was completely lost.
Issue #1:
Installing Maya at home.
As a student you can get Maya really easily as an installer, Just get to correct tab, select the correct OS, the version you desire and the language. At this point you can install properly using an installer. But every time I attempted to install using the installer it would always fail installing three different sections. I had even attempted getting the installer again after getting rid of the first version and trying on a different PC all together. But to no victory.
 Issue #2:
Corrupted Scenes.
After creating three or four different .avi scenes ready for hand-in. I thought I would have a break and come back to it. Once I returned Maya could not recognise the file type and loaded nothing on to the scene.
Issue #3:
Corrupted Models.
Models saved as a .FBX (exported maya model) was not the correct file type and were wiped.
Models could not be exported as a .FBX later into the course.
Models saved as .MB (maya binaries) were not supported and were wiped. Meaning I had to re-texture my X-Wing model.
While trying to import my Imperial Star Destroyer and my TIE Fighter it would just change the scale of my Star Destroyed without a visible TIE-Fighter model.

Issue #4:
Corrupt .avi
We had to create our animation using .avi file format. So once I had completed one of my scenes and already previously viewed the file I had carried on creating more scenes. Later on my .avi file had been corrupted and wiped so the scene was completely lost.
Wednesday, 30 November 2016
Using SDK
SDK or Set Driven Key is very similar to the constraint tools, but is very specific and adjustable. Following an example below, what happens here is when the sphere has its position adjusted across the Y-Axis; the cube will rotate against the Y-Axis.
This is great for a cause-affect situation. You can adjust how much the Driver affects the Driven.

This is great for a cause-affect situation. You can adjust how much the Driver affects the Driven.

Constraints
Creating Contraints,
This makes models be affected be affected by transformations of other transformations.
I have played with all the Create-Constrain tools to see how they affect each other. For example the aim constraint that makes a model constantly face another model, no matter its position. Other tools do things such as:
Model rotated at the same degree difference as another model constrained to it.
Model is fixed perfectly between two other models no matter where they are translated.
Model has its scale changed dependant on another models scale.

of all these constraint tools my favourite was Point. This made it so a model is fixed perfectly translated between two others. I used six spheres to create an almost slug model. This used with Aim could work really well to create an animation about a snake or any long bodied animal.

Wednesday, 23 November 2016
Camera Angles and Cinematography
While using a camera to create shots you often have to think of perspective and a hierarchy of how the character of scene shot works. With this comes many rules and multiple types of camera shots to learn and how they can be used effectively. Whether it's the low angle from a giant to a smaller character or a reverse tracking shot on a subject to exaggerate the expanse of their surroundings.
 This image to the left really helps to give a simple understanding of the key terminology.
 This image to the left really helps to give a simple understanding of the key terminology.
- Pan - Moving the camera along the X axis.
- Tilt - (Imagining the camera is on a fixed stand such as a tripod) Rotating the camera up and down from a fixed point.
- Dolly - Moving the camera as an object without zooming.
- Tracking - Moving the camera left or right, like it was attached to a track.
- Crane - Having the camera attached to something off of the ground.
Below is a link to show all the different camera shots available.
http://www.empireonline.com/movies/features/film-studies-101-camera-shots-styles/
Wednesday, 16 November 2016
Bouncing Ball Tutorial
I was given the task of following the grid below. It shows frame by frame of how to animate a bouncing ball.
The idea was to make a key frame as every numbered point where there was a filled black circle. But there were issues in animating it regarding rotation to to polish the animation I also added a single frame before and after the ball makes contact with the floor (frames 6, 8, 16, 18, 24, 26 and 30).

Following the tutorial was really easy and simple but helped me get around how the key frames worked. Issue I had was that on occasion I would manipulate the sphere to fit in with the next key frame and I would have forgotten initially to select the frame I wanted use.
I also added flat cube surface as a floor so when viewing to was easier to see the points of bounce.

Here is the graph editor of the bouncing ball example.
You can see the bouncing ball follows the green line that curves up and down. After finishing the last key frame I had improved this line so it followed the path to a higher quality.

Handles
Handles allow the manipulation of objects to become a lot easier. Using grouping in the Outliner, I have made the cone and sphere a child of the 2D circle found in 'curves/surfaces'. Now if I select the cone or sphere an manipulate either it will happen separately, but if i manipulate the circle both the cone and sphere will be manipulated along with it.


- Create 2 separate objects.
- Create the 2D circle.
- Open the outliner, select both 3D objects created in the first step and drag to the 2D circle in the outliner using the middle mouse button.
Monday, 7 November 2016
Boolean with an Extrude
Construction of an odd shape
Before I begin I wonder what basic shape to start with. If I see a shape with a circle I will almost certainly use a cylinder or sphere as the start shape. So I had placed it correctly according to the image plane and then I noticed I wanted a flat side to be pulled up with vertices pulled closer together. So I would use a simple cube shape to cut the clean surface out and continue just as previously stated. But it needed an inner circle extruded inside itself and that took priority as there would be a face issue to extruded inwards an circle if the face was not a circle.

 From the example above you can see the end result. I have given a visual example of what i had done to create the top area of the cylinder.
- Extrude another circular face into the cylinder.
- Cut a cube out of it (shown by a grey box).
- Extrude the upper flat surface up and transform the vertices closer together on the x-axis.
- Push the smaller circular face in using the extrude tool.
Friday, 21 October 2016
F-16 Plane
This is the first model of a ship i had made. There are ways I could improve but for a beginner model I am very pleased.
Isues:
Isues:
- The body of the plane goes into the cockpit. I could use the boolean tool to get rid of a certain chunk so it is no longer visible.
- The alignment of the image planes were not perfect so I would often refer to 2 image as the final sizing and scaling but use the other for scaling where it was not possible on the others.
- Visible polygons on the nose.
- Using and highlighting the correct vertices for perfect manipulation.
- Use of the extrude tool for the back engine.
- Knowing what shapes to use in what areas and how to cut an image with the Ctrl key.


Wednesday, 28 September 2016

Tuesday, 27 September 2016
Why the Blog?
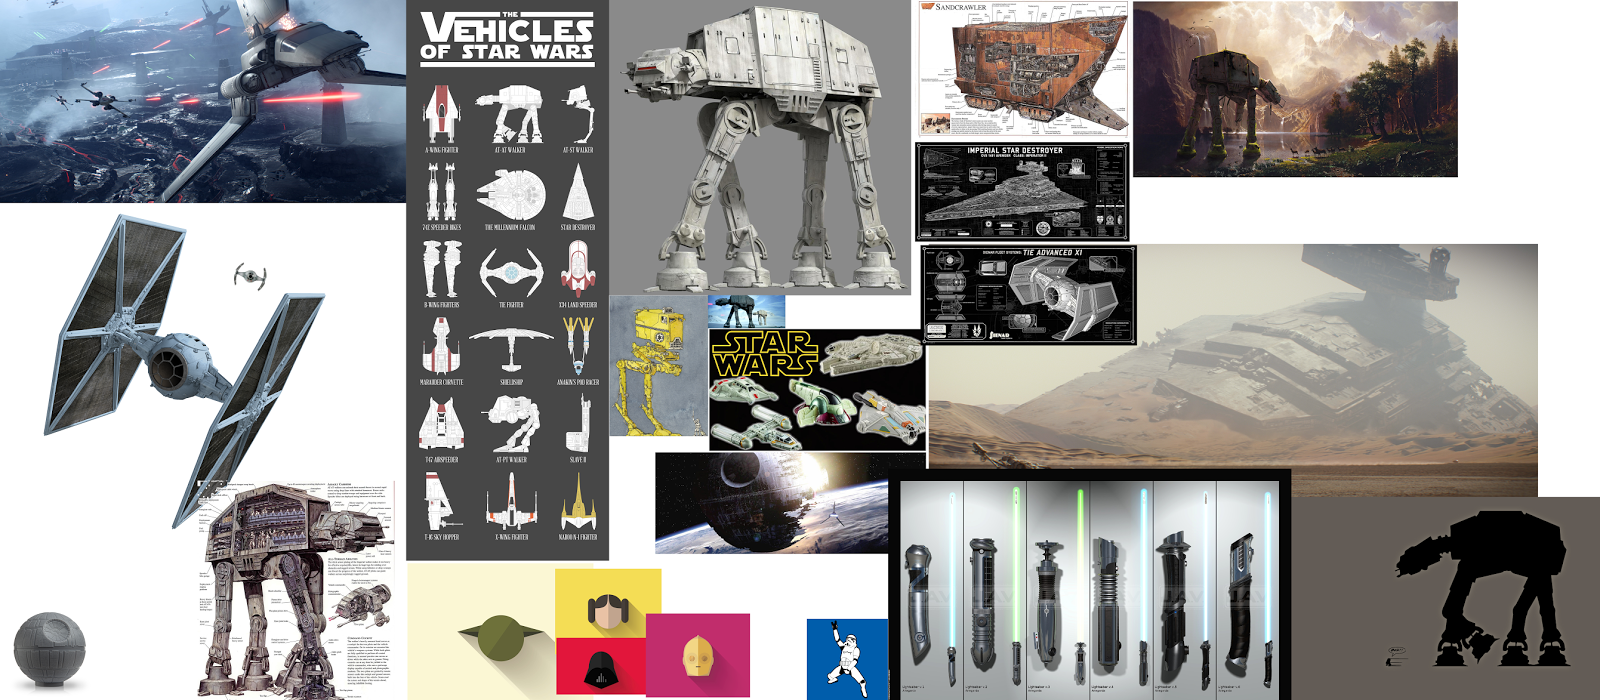
In this blog I will explore animation and 3-D modeling. I have been asked to make a 30 second animation based around Star Wars.
| https://upload.wikimedia.org/wikipedia/commons/thumb/6/6c/Star_Wars_Logo.svg/1280px-Star_Wars_Logo.svg.png |
Subscribe to:
Posts (Atom)