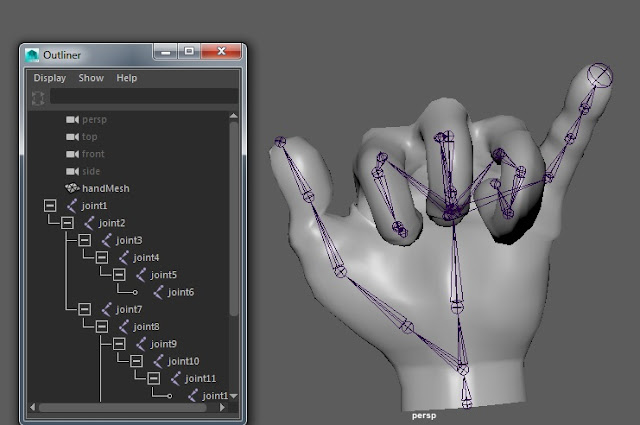
The hand below started spread without the blue wires you can see below within the hand.
To create the Rig (blue spines) got to animation mode and then Ridding>Skeleton>Create Joints Tool,
While creating the joints you may notice they are all in one flat plane. This will be because they do not know where to auto fix. So once all rigs have been created just adjust the translation to fit accordingly to how you want it. In the exercise we had to create multiple joints from a single branch. This meant using the Oueliner from the windows tab and selecting where to add an extra rig from.

Once the Rigging has been completed it is time to Skin. Like i said previously the skinning is to allow proper manipulation of the model as desired by the creator. To access this select rig and then the model and proceed to select Skin>Interactive Bind Skin.
At this point you can select different parts of the rig to see a heat map and adjust it to your liking. Your able to adjust how much the rig can be manipulated and the area .
Red = Heavily manipulated
Orange = Very manipulated
Yellow = Slightly manipulated
Green = Hardly manipulated
Blue = Not manipulated
Once completed I wanted to show my skills and make a hand with a thumbs up. Unfortunately the model hand could not support this as it is a very old example.
No comments:
Post a Comment